How to Detect and Remove the Phone Virus?

In this Article we have explained to Remove the Phone Virus and its necessary to do so.

In the digital age, more than 6 billion people are using smartphones that store a lot of personal information, social media accounts, contacts, and bank account logins. Henceforth, it is a goldmine for cybercriminals. To keep phone safe from the cyber criminals, the users must take necessary precautionary steps.

How do I Cancel my McAfee Subscription?

Infected Phone and Wants to Remove the Phone Virus?

Call us Now at +1-855-362-0770 & Remove the Phone Virus.

This blog explains the various types of viruses phones get and how you can identify and remove them. If your phone gets infected by the virus, then do read this blog.

Can iPhone and Android Phone Get Viruses?

If you are the one who thinks that the phones are safe and do not get infected by the virus or malware. Then, to your surprise, phones (both the iPhone and Android smartphones)are affected by the virus too. No wonder the operating platform of both phones differs from each other and have a different technical speciality. The virus penetrating time on both platforms also differs. In comparison to iPhones, Androids get easily affected by virus attacks, as the iPhone platform is more secure and does not allow third-party applications.

How Do Phones Get Viruses?

Phones get viruses the same way computers or laptops do. The most common way phones get affected is by clicking on a suspicious link or downloading a third-party app from an unknown source. Usually, the users receive these suspicious messages through emails, text messages, or social media messages. If you visit a malicious website, then there is a high chance that your phone will get affected by the virus. Apart from these, hackers always try to find a new way to hack your phone.

What are the Different Types of Virus Phones Gets?

Phones get different types of viruses. The viruses on the personal device can harm you in various ways. It can affect you by getting your phone bill increased, can delete or your personal and important information, making an unauthorized purchase, gathering personal information, and can use it for unethical purposes like blackmailing or identity theft.

The Types of Viruses Phones Get Are as Follows:
  • Adware: It creates pop-up ads to collect the personal information of the user. It not only irritates the users but also tracks the activities of the users.
  • Malware: It is an umbrella term that is used for all types of malicious programs that are specially designed to exploit or harm your phone. These malicious programs extract personal data for financial gain.
  • Spyware: The malicious programs install themselves on your phone without your prior knowledge and secretly gather your personal information such as websites visited, passwords or credit card information, and more. It also tracks your online activity and forwards it to a third party without your concert for financial gain.
  • Ransomware: It locks the personal information or precious memories until you fulfill the demand of the hacker, which is usually paying the ransom.
  • Trojan Horse: This is the most common virus that attaches itself to a legitimate program and interferes in the operation of the program. It usually corrupts your data.
  • Worm: It is usually spreads by the text message. The main aim of the worm is to spread the virus to a maximum number of phones so that cybercriminals can have the maximum financial gain.
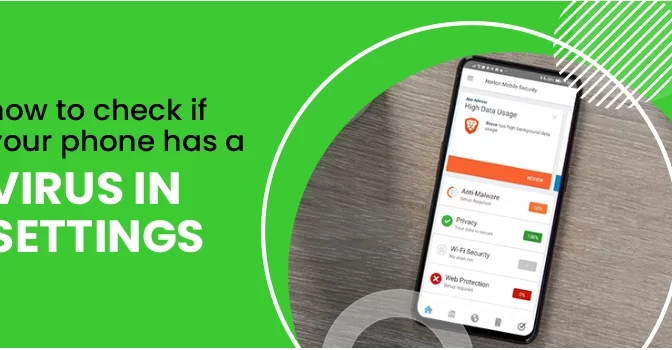
How Can I Check If My Phone Has Virus?

To keep the phone safe and Remove the Phone Virus, the users must perform the virus scan on Android phones or iPhones. The common signs and symptoms will help the users identify an infected phone:

  • Faster drainage of the battery.
  • A lot of ads pop ups.
  • An unusual message your contacts receives from you.
  • The apps are taking more time to load.
  • Your phone performs too slowly.
  • There is an unexplained increase in data usage.
How to Remove Viruses from Phones?

No doubt the Android or iPhone platforms are safe, yet viruses find a way to break through them. In case malware or virus affects your phone, there are several things that you can do to remove the virus from your phone.

The Things to perform are:
  • Download Reliable Antivirus
  • Deep virus scan on Android phones.
  • Switch Off and Reboot in the Safe Mode
  • Uninstall the Suspicious App
  • Change the Passwords
  • Add two-factor authentication.
Tips To Keep Phone Safe?

It is never too late to keep your phone safe. Follow the below tips to reduce the risk of virus or malware affects your phones

  • Strong and Unique Password

Instead of using the same simple password for all the apps or accounts, create a unique password for each one. Even if your account is under Viruses threats, if the passwords is the combinations of lower case, upper case, special character and number will definitely safeguard your accounts.

  • Download from the Trusted Website

It is advisable to download any app from a trusted website or from Google Play. Before downloading the app, look for reviews and stars. Always prefer high-rated apps with positive customer reviews. Do not forget to have a look at how and what information does the app use.

  • Clear your Cache

Scan your phone periodically and delete the cache or browsing history. Do not forget to delete the pre-stored passwords.

  • Wait for a Little Before Providing Permission

Different downloaded apps seek various permissions. Instead of providing all the permission the app asks for, wait for a while and give the permissions only when required.

  • Take Care of Login Credentials

Always try to avoid saving the passwords on your web browser. To avoid misuse at a later stage, always log out of the accounts after using them. Though it might be a little inconvenient, it is harder for viruses to access your account during the attack.

  • Update your Operating System Frequently

A regular update of the operating system enhances the security feature of your phone. The updates contain the security patches that creates in response to the specific threat in the previous version.

  • Before Clicking A Link Think Multiple Times

The spammers send suspicious links that contain viruses or malware. These links are part of the phishing scams. Avoid clicking the links that have trust issues.

Conclusion

No matter how conscious you are while browsing your phone, there are still chances that you will get the virus. Furthermore, In this blog, we have explained the method to keep the phone safe and Remove the Phone Virus. Hence, Removing the virus all by yourself can be quite frustrating. If you do not want to perform the task by yourself, then our experts will help you. Though, You can get in touch with them over the phone, email, or chat.

How to Fix Netgear Router DNS Server Not Responding Issue?

To fix Netgear Router DNS Server Issues, go through the blog thoroughly, follow the steps suggested.

Netgear profiles and gives an entire future Wi-Fi band. It provides the fastest speed with less congestion. They provide excellent service in the networking market with products for business and home for business and home, including wired and wireless technology. People usually buy Netgear directly because it gives free shipping, a hassle-free return policy, and a simple and secure checkout system. Netgear supports the smooth functioning of DNS servers, but sometimes it stops responding.

An Overview to Fix Netgear Router DNS Server Issues

DNS is an essential part of setting network configuration. Domain name systems are necessary to convert domain names into IP addresses. Most internet service providers provide a  DNS server address automatically to the router addition to this, Netgear router DNS Server is giving a Supreme facility to its customer. 

But sometimes, users face issues while trying to configure the router to use another DNS server. The best resolution for this type of error is that the user needs to access the router’s web configuration. This is only possible by logging in to your router, followed by opening the internet setup page.

Solutions to Fix Netgear Router DNS Server Issues

This blog read some resolution to this problem, but if this issue is not resolved after applying this step, the user can call the Netgear support number to have an advanced solution.

Solution 1- To use another DNS system, it is essential to configure a workstation
  • The first step is to go on the control panel of the workstation
  • Now from the network setting option, select the network connection that is suggesting an opportunity for a DNS issue
  • Then, move to adaptors TCP/IP properties
  • Finally, carefully add the DNS server with the appropriate address provided by ISP
Solution 2- To use alternative DNS to configure the router to have the best results
  • Now go on web router configuration and access according to the requirements
  • The next step is to go on basic settings and select use these DNS servers
  • Now with total concentration and the correct DNS address given by ISP
  • The final step is to click on apply to complete the process

Conclusions

I hope this blog helps you and you can resolve Netgear router DNS not responding issues, and users must note the exact steps to configure and fix the Netgear DNS Server issue. If you have any trouble configuring your workstation, you can call the Netgear customer service number and ask for help. Furthermore, The experts are available in their customer’s service round the clock and will give assured best assistance.

How do I Reset my NETGEAR Router?

People usually reset Netgear router when it fails to work adequately. If you are facing a similar issue, fret not, as the answer is within your reach. If your router is not working properly or worse, you don’t remember your password to connect; it is time to reset your router with the valuable insights given in this blog. It is normal to come across technical issues, which is why if you come across some problems with your Netgear Router, feel free to reach out to Netgear customer service for step-by-step guidance.

An Overview to Reset Netgear Router

In case your wi-fi card fails to get detected, you should reset your router. This problem takes place when network drivers are not installed properly. The spot where you placed your router may not receive an adequate signal. It is one of the primary reasons why your router might not work. Hardware problems also may be the root cause of this problem. In case any operating system corruption has taken place, the router ceases to function properly. Let’s discuss the common issues faced by Netgear below before we jump to the how-to reset Netgear Router issue.

Common Issues of Netgear:

  • There may be a problem in fitting the wi-fi card properly.
  • The Netgear router may be switched off.
  • The router may fail to function when there is a lack of power supply.
  • The router might get a weak signal, sometimes.
  • There might be a problem connecting to the access page while typing the password.
  • Change the direction of the router in case of weak signals.

Getting to know the common concerns faces by Netgear users will help others in being prepare for them early on. It’s like learning from others’ mistakes is better. Let us take you to a walkthrough on the best methods to reset Netgear Router.

Quick-Fix solutions to Reset the Netgear Router
  • Please make sure you have turned on the router before resetting it.
  • Move your router to the other side to make you face the backside of the router.
  • Find your Reset button to enable resetting your router to its previous settings.
  • Try using a paper clip to press the reset button and hold the key for a minimum of seven seconds.
  • After this step, you can let go of the button and pause for 7-10 seconds. The router will start to reboot.
  • You will notice the flickering of the Power light as the reset procedure begins.
  • Once the process is Complete, the light will stop blinking.
  • The Netgear Router will be resets to the default settings now.

Conclusions

Although, we tried to answer the Netgear-related queries. However, suppose you feel the problem needs to be rectified further. In that case, you can contact the Netgear phone number for detailed guidance from certified experts who are available to resolve your trickiest of concerns with patience and tenacity. They are professionally qualified and highly experienced in solving your technical issues associated with Netgear, so you need not worry anymore. Enjoy your high-speed internet without any hassles, delays, or obstacles.

Six Easy Solutions to Restore Missing AOL Desktop Gold Icon

Is your AOL Desktop Gold icon also missing on your PC? Well, you are not the only one who is facing this issue. We have received many queries on this issue, and that’s why we are here with a proper and informative blog. This blog post will provide you with all the relevant an necessary information about the reasons behind the problem and how to restore the missing AOL Desktop Gold icon.

So, stay tuned and read this blog post carefully to get the problem fix.

How to troubleshoot AOL Desktop Gold Won’t Open issue

Possible Reasons Behind Missing AOL Desktop Gold Icon

Some possible reasons why the AOL desktop gold icon may be missing on your PC are as follows.

  1. When the AOL desktop software has not been installed properly on your PC.
  2. The PC’s hard disk is damaged or corrupted.
  3. When your PC is affected by an antivirus or malware software.
  4. When you forget to add the shortcut icon to the desktop screen during the installation process.

How to Solve AOL Desktop Gold Icon Missing Problem?

Listing a single solution that will work for you on the first trial is impossible as there can be many reasons for the problem. Although below, we have listed some of the tried and tested solutions you can follow to solve the AOL Desktop gold icon missing problem.

Dial Toll Free Number : +1-855-362-0770

Solution 1. Deep Restart your PC

Sometimes, the old method of restarting a device can be a solution to solve the error. A deep restart of the PC closes all the pending processes and background running applications, further improving operation and performance. So, for performing a deep restart of the PC, here are the steps.

  • First, close all the running applications.
  • Thereon, press the “Alt +F4” keys together to open the power window,
  • Now, select the “Shut Down” option under the drop-down list and click on the “OK” option.
  • Once your PC has been switched off, wait for a few minutes, and then turn on your PC.

After you have performed the deep restart process of your PC, then check if the AOL Desktop Gold icon has been restored or not.

Solution 2: Implement Necessary Changes in Windows Settings

If you have made some unnecessary changes in the windows settings by mistake, then there can be chances that those settings may delete or remove the AOL desktop gold icon on your PC. In that case, below are the steps you can follow to troubleshoot the problem.

  • First, right-click on the free space available on the desktop screen of your PC.
  • Thereon, under the list, click on the “View” option.
  • Moving ahead, search for the “Showing Desktop Icon” option and click on that.
  • After that, if you find any application unchecked, immediately move the slider to the enable the display desktop icon option.
  • Now, save the updated changes and close the window.
  • At last, on your desktop screen, right-click on the screen and click on the refresh button.

After performing this, again restart your PC and check if the AOL Desktop gold icon has been recovered or is still missing.

Solution 3: Scan your PC through the Antivirus Software

If your PC has been attacked by antivirus software, it can lead to many problems in your system, and the missing AOL desktop gold icon can be one of the problems. In that case, scanning your PC through the antivirus software and repairing it immediately can be a solution to fix the problem. So, below listed are the steps that you can follow to scan your PC through an antivirus software.

  • First, download and install an antivirus application on your device.
  • Thereon, double-click on the application icon to run the software.
  • Now, perform deep scanning of your PC and select the entire system before starting the scanning process.
  • Once the scanning process ends, you will get the list of all the items affected by the virus.
  • After that, delete the potential malware application from your PC and repair all the applications affected by the virus.

At last, after completely removing the malicious software and application from your PC, then go to the desktop screen and check the recovery of AOL Desktop Gold icon.

Solution 4: Manual Add the AOL Desktop Gold Icon

For manually adding the AOL desktop gold icon to the desktop screen, here are the steps you can follow:

  • First, on your PC, go to the “My Computer” and click on the local disk C option.
  • Now, go to the Programs and files and search for the AOL desktop folder.
  • Under the folder, click on the AOL Desktop icon option and right-click on the icon.
  • After this, to add the AOL desktop gold icon, click on the “Create
  • AOL Desktop Gold” icon option, or you can also manually drag the icon to the desktop screen.
  • At last, refresh your PC’s screen, and the missing AOL Desktop gold icon will probably appear on the screen.
Solution 5: Disable the System Maintenance Option

Now, for disabling the system maintenance option in your PC’s settings, here are the steps you can follow:

  • First, hit the windows button on your keyboard to go to the start menu.
  • Now, type “Control Panel” in the insert box and enter.
  • After that, click on the “System and Security” option, and thereon, click on the “Fix and Find Problems” option.
  • Moving ahead, click on the “Computer Maintenance” option.
    At last, slide the radio button to disable the system maintenance.

Then, restart your PC and check to restore the AOL Desktop Gold icon on your desktop screen or is it still missing.

Solution 6: Reinstall the AOL Desktop Gold

By reinstalling the AOL Desktop gold desktop application, you can resolve many errors related to the software. So, here are the steps that you can follow to reinstall the AOL Desktop Gold on your PC.

Uninstall the AOL Desktop Gold

First, let’s look at the steps you can follow to uninstall the AOL Desktop gold application on your PC.

  1. For uninstalling the desktop gold application, first close all the background running applications and pending commands on your PC.
  2. Thereon go to the control panel settings.
  3. Now, under the control panel, click on the “Programs” > “Programs and Features” > “Uninstall a Program.”
  4. You will now see the list of all the applications installed on your PC.
  5. Please search for the AOL Desktop gold and right-click on its name.
  6. Then, select the “Uninstall” option.
  7. Now, a pop-up message will appear on your screen displaying, “Do you want to keep the data related to the application”?
  8. Moving ahead, select the “Yes” option for the pop-up window, and then the uninstall procedure of the AOL Desktop Gold will start.
  9. Once the process ends, then restart your PC.
Install the AOL Desktop Gold 
  • First, go to the official website of AOL desktop gold.
  • Now, search there for the AOL Desktop gold software.
  • In the next step, click on the downloaded link to download the software to your PC.
  • Once the downloading ends, then save the downloaded file in a secured location.
  • Thereon, right-click on the saved setup file to run the file in administrator mode.
  • Now, accept all the terms and conditions, and after that, start the installation process of software on the PC.

Once you have installed the software on your PC, re-login to your AOL Desktop Gold account and check if this method has helped restore the AOL desktop gold icon or if it is still missing.

Wrap Up

So, that’s all with the blog on how to restore the missing AOL icon. Above, we have listed six solutions you can follow to restore the missing AOL Desktop gold icon on your desktop screen. In case you face any challenge while performing any of the steps mentioned above or if you have any query related to the error, then you can reach out to us through the chat box, or you can mail us your query . Our experienced and professional experts are available 24*7 at the help desk to answer your query.

How to Fix HP Printer Cartridge Problem?

HP a milestone in the market of technology. Yet a common problem faced by its customer is the HP printer Cartridge problem. The message is flashed on the control panel and restricts the printer to print the desired output. The customer can improvise this error by following simple steps, but the customer fails to do so. They must contact the HP support center for any assistance. Their highly qualified tech team is always available for help from their customers.

A message like “Print cartridge does not detect or missing “will hinder work and spoil your mood then. This blog reads the most helpful solution to this problem.

Dial toll Free Number : +1-855-362-0770

Significance of Failure of HP Printer Cartridge

This problem arises when the user is printing documents, or the ink tank is empty. There might be another reason that the printer is not able to recognize the cartridge. The failure in the printer’s cartridge will result in a stoppage of printing the documents.

Ultimate troubleshooting steps to eliminate cartridge error

The user might forget to remove the detachable Yellow sticker on the printers cartridge
  • The printer won’t acknowledge the ink cartridge until the user has not removed the yellow tape from the ink cartridge’s top. It is necessary to strip off the protective strip to start printing new documents while installing a new ink cartridge.
Outdated printer drivers can also cause this type of error 
  • Setting which suggests the auto-update is necessary and fixes any errors, but sometimes it also creates some ink cartridge problems. Users must update the printer driver and can remove this error easily.
Clogged nozzle and dirty metal contact
  • Dust and greasy metal contact or particles are a high risk to HP ink cartridge. User must ensure that the HP printer cartridge Problem must not have any broken or damaged piece while fixing the printer and cartridge. This will result in unreadable commands for the printer cartridge.
Ruined chips can also be the root of this error
  • After refilling the ink cartridge, the error continued in the ink cartridge. Surely the reason will be the leak of ink and when the computer starts reading the chips. They are damaged and unable to respond. Users will need special tools to fix this problem.
Installation of the inappropriate ink cartridge
  • Users sometimes install incompatible ink cartridges that result in an error with the flash of a message that the ink cartridge is incompatible with reading. Hence must take the help manual and adequately identify the type of cartridge fit in the printer.
  • Users sometimes install color cartridges in black and white cartridge tanks and vice versa. They must ensure the right fixation of cartridges in the tank.

Conclusion

WE hope you find this blog helpful, and it suggests cool steps to rectify the ink cartridge error. Users are free to contact HP customer care number and obtain the best possible assistance from their active and enthusiastic tech team. Their technicians are dedicated to helping their customers to the best.

How to Download and Update Canon Printer Drivers Manually

Canon Printers are currently among the top-most printer manufacturer available for users at affordable prices. The printers are available in a variety of options along with various features based on different types of users. However, sometimes users face a number of issues, among which the most common is the pending Driver’s update. Thus for that, we are going to provide all the necessary information on how you can download the Canon Printer from the official and a step-by-step guide to install them. Read the article further to get more information on Canon Printer Drivers.

How to Connect Canon Printer with Mac?

Why There is a Need to Update the Canon Printer Drivers Manually

The officials provide the facility, due to which the drivers get automatically updated in their printer. However, sometimes due to some technical fault or any other malfunctioning, the Driver will not get updated in their printer. Thus, for these users, there is a necessity to download and update the Canon printer driver manually. The drivers for the printer can be downloaded from the official website. There, all you need to do is to type printer details, and from there, you can find the list of the latest Driver available for your printer.

Dial Toll Free No.: +1-855-362-0770

Why Should I Download Printer Drivers

Although your printer might work perfectly without any new upgrades, there is a necessity that your device should be updated with the latest software components. Below are some of the facts that can support this statement:

  • Without any proper update, there are chances that your printer application might crash or freeze while working with other applications.
  • Without the updated Driver, your printer firmware might be vulnerable to malware files and other corrupted files.
  • Your printer firmware might be incompatible with your computer in case of pending updates.
  • You cannot enjoy new features or utilize your printer at its full calibre without updated drivers.

Different Methods to Download and Update Canon Printer Drivers

Various methods are available for the user to update their Canon Printer drivers. The first and foremost is to download them from the official website. Apart from them, various other sources are available from which you can download them without any risk. Thus, here we are going to discuss all the methods through which you can download a driver:

Download the Canon Printer driver from the official website. 

The First and foremost method is that you download the Canon Printer driver from the official website and then manually install them in your system.

  • Visit the official website of Canon and then go to the official support page.
  • After that, you need to type your Canon Printer details. After that, based on your printer model, you can get a variety of options.
  • Select the option “Software and Drivers.”
  • After which, you can find the list of drivers from which you need to cross-check whether your Canon drivers in your printer are of the latest version.
  • In case you have an outdated driver, then you need to click on the “Download” button.
  • Wait for the download to get complete, and afterward, proceeds further to start the installation.
Install Canon Printer Driver on your System

Open the device manager by the “devmgmt.msc” in the run prompt.

  • Navigate the option “Print Queue” and search for the printer device whose Driver you need to update.
  • Right-click on it and then select the option “Update Driver.”
  • Afterward, select “Search Automatically,” after which the System will pick up the downloaded Driver and start the installation process.
  • Now restart your computer.
Update Canon Printer Driver in your System from the system settings

Users can also manually proceed to update their Canon Printer Driver from the system setting. Below are steps for updating the Canon Printer driver for system settings:

  • Open your system settings and then select “Windows Update.”
  • Now select the option “Check for Updates.”
  • Once the System has completed the check, you need to click “Advanced Options” and then “Optional Updates.”
  • Click on Driver Updates, after which you need to search for the Driver associated with your Canon Printer.
  • Now Download and Install, which will automatically install the printer updates.
Canon Printer Support

This is the official support from where you can download and Update Canon Printer drivers. Apart from that, users can find various other options through which they can get assistance for any issues with their printer. Some of the means to connect with Canon Printer Support are listed below:

  • Canon Helpline Number: This is the primary method to get assistance from customer care. The sales and technical teams of Canon support are available 24/7 to help users with any issues they are facing with any Canon device. You can find the Canon Helpline number from the official Canon customer site based on your location.
  • Canon Community: Users, who are having any issues with their Canon printer, can get connect with the official Canon Community forum, where all they need to do is to type their query, to which either Canon’s official or other users will revert in the given time.
  • Canon Knowledge Base: Here, you can find blogs on various issues which are most commonly faced by users. You can find the link for Canon Knowledge base from the official product support page.
  • Canon How-To-Videos: Here, users can find useful troubleshooting videos on different topics, majorly covering all the common issues user face with their Canon device, especially on how to update drivers on Canon Printer.
  • Canon Printer Manual: User Manuals are available from which you can learn how to set up your printer. Apart from that, you can also find the details on the driver updates for your Canon Printer.
Reach out to Our Customer Support Services

Users who are having any trouble or issues with their Canon product can reach out to our customer support, where we provide assistance for not only Canon Products but many other devices. Our customer support services are available 24/7 for the user, to which they can connect through the means of Phone, Live Chat, Mailing, and many others. Our customer support is preferred more than any other support service due to various reasons, some of which are listed below:

  • Users can reach out to us 24/7, where they will instantly connect with a live person who can easily understand their problem and revert to it with the required solution.
  • Like other premium services, our services are available at minimal rates, which is affordable by anyone.
  • Our customer support expert provides assistance with all Canon products. Not only printers but also a variety of devices, which include a Printer, Laptop, or any other hardware or software component.

On an Ending Note

From the above discussion, we hope that now you can easily update your Canon Printer Driver. Make sure while you  manually update Canon Printer; you have downloaded the Drivers from the official website or any other trusted source. Now, in case you have any trouble or issue with your Canon Printer, you can easily connect with us through the number given below, or you can easily connect with us through the Live Chat option.

Where is the WPS Button on My Netgear Router?

Generally, people know about a router in white or black as a box placed in the corner. This box has green or orange lights that flash continuously. Suppose you are using the Netgear router, you never know how it is working and the WPS button location.

Users might have seen blinking lights while the router in operation. Never think about any problem while calling, emailing, or chatting with Netgear customer service to resolve it quickly.

Navigate WPS Button on Netgear Router

Using routers having little knowledge about resolving problems connected to it can be dangerous. Nowadays, many users don’t have any necessity to know about the router how it works. Few different buttons have more meaning than their working information. Many users call customer support to understand and resolve the router issue, but these questions are quite meaningless because it seems they have already fixed them.

Here, you will get knowledge of some better technicality about Netgear router. You must read few guidelines from the technical manual while facing any problem with the Netgear router. It can be a WPS button finding an issue on Netgear routers.

Why is the Use of WPS Button?

You must know first the meaning of the WPS button. The WPS button is not available in the Netgear router but on every router.

WPS is an acronym of something so crucial and valuable.Wi-Fi Protected set up take care of your internet security.

Take a Look at the Easiest Way to Get WPS Button on My Netgear Router

WPS button is used on the router to connect Wi-Fi network without a password. It means the person who will come near you can access your Wi-Fi network. The WPS button is available to use more often when you have lost your Wi-Fi password.

Few procedures are listed below to find the WPS button on the Netgear router

  • First of all, do some homework on essential things. Check if your router is on or not. To examine if the router-id is switch on to confirm the lights of your router.
  • Lights are switched off; the router is turned on, so you must plug the router with an electrical supply and turn it on.
  • After that, get where is the WPS button on the corresponding router. 
  • Button WPS is present at the back of any router, so it’s the same with the Netgear Router.
  • Therefore, you must take your mobile to the system and connect to the WPS network. Get the proper information on how to connect WPS through your router. It will assist you in clicking WPS to find where is the button on my Netgear Router.

Conclusion

After reading the above steps, you must get the button on the Netgear router. Suppose you can’t locate it, then you must dial Netgear phone number to fix it immediately. The technical care center is available round the clock to assist you. The technical team are professional to handle any request from its customers.

How to troubleshoot AOL Desktop Gold Won’t Open issue

In a world that runs on instant gratification and quick delivery, we don’t want anything that takes time. Although AOL Desktop Gold is an all-in-one, one-stop solution that offers unlimited web services with greater security and faster processing speeds, it can sometimes fall short of the mark. There are times when AOL Desktop Gold won’t Open. It can occur because the setup might have been corrupted, or there is some damage to the installation files. You need to consider downloading a new setup.

AOL Email Not Receiving Emails

Furthermore, This should resolve the AOL Desktop Gold not opening issue. In order to enable you to resolve AOL Desktop Gold problems, we are listing down steps that can effectively fix the AOL Desktop Gold Won’t Open issue.

Things to keep in mind before resolving AOL Desktop Gold Not Opening concern

Usually, technical issues don’t arise because of just one reason. Hence, Multiple reasons can lead to the occurrence of the AOL Desktop Gold Won’t Open issue. Some of these reasons are listed below-:

  1. Improper or incorrect installation of AOL Desktop Gold
  2. Damaged or corrupt AOL software files.
  3. AOL gold is not compatible with other files installed on your system
  4. Damage due to virus or malware in the system
  5. Damaged or corrupt hard disk

Methods to fix AOL Desktop Gold won’t open issue

Below given are the steps that can troubleshoot AOL Gold won’t open issue-:

  1. Scan your system thoroughly with the help of an antivirus
  2. Ensure that your system has all the requisite requirements available that are needed for the installation of AOL Desktop Gold
  3. Delete corrupt or incompatible files from the system
  4. Ensure that your internet is working properly
  5. Try updating the AOL Desktop Gold software; if there is an upgrade available
  6. Delete the browser cache from the browser settings
  7. If any of these steps don’t work, try reinstalling the AOL Desktop Gold from the official website
  8. Choose the AOL Desktop Gold option and uninstall the program
  9. From the official website of AOL Desktop Gold, download the software
  10. Upgrade AOL Desktop Gold by fixing this newly downloaded file
  11. After the installation is complete, reboot your system

A list of problems with their solutions when AOL Desktop Gold Won’t Open

AOL Gold not responding is one of the most common issues regarding AOL Gold problems. It happens that sometimes, AOL Desktop Gold doesn’t respond to the command given by the user. Several factors can be responsible for the problems occurring with AOL Desktop Gold. We are going to discuss in detail steps that can help fix this issue. One of the most common issues on the internet, AOL Gold not responding issue throws certain errors and can be fixed in the following ways-:

Quitting the program from task manager- 

If you find the AOL Gold not responding error, the first thing you need to do is quit the program and restart it.

Windows users-
  1. Start the task manager by clicking on Ctrl, Alt, and Delete buttons together.
  2. Choose the process tab
  3. Now, choose the AOL Desktop application
  4. From the Pop-up window, choose clicking on the End program
  5. Reopen the AOL Desktop Gold program after it disappears from the Process Window
For Mac Users-

For Mac Users, you should follow the steps below to quit the program-:

  1. On the Task Manager, right-click on the AOL Desktop icon
  2. Now, choose Force Quit to shut the program down
Fixing the Incompatibility Issue –

A major reason behind the incompatibility of the AOL Desktop application is the inadequate hardware needed by the AOL Desktop application requirement. Checking the device compatibility for your AOL Desktop Gold is extremely crucial in this case. Finally, you need to upgrade the device hardware, enabling you to run the program on your device. The following requirements should be met for AOL Desktop software to be installed on your computer-:

  1. 266MHZ processor version or faster.
  2. 1 GB RAM
  3. 512 MB hard drive
  4. Windows 7 or mac osx 10.0.0 or later versions
Removing the virus from your system-

If your system has all the requisite amount of hardware but still running slow, it could be because of the presence of a virus in the system. It could also show AOL Gold not working error message. In this case, you should scan the computer and look for malware that could have affected your system. Once you scan your computer and get the bugs out of your system, then it should be working fine.

Reinstalling the program-

If even after following the above steps AOL desktop Gold is not responding, then in that case, you should uninstall and reinstall the program again. 

Try following the below-given steps for you to be able to do so: 

Windows Users:

For Windows users, reinstalling the program is quite easy. You just need to go to Programs and Files. Hence, you need to select the AOL Desktop program option and then Uninstall. After uninstalling, you will have to re-install the application. Also, restart the system for changes to take effect.

Mac users:

Choose AOL Desktop Gold application >> send it to the trash folder. 

After uninstalling the program completely, go back to the AOL desktop gold website and download the latest AOL Desktop Gold version and download it. After that, re-install the program.

Once you follow these instructions, you can easily fix the AOL Gold not responding problem.

What happens when AOL Desktop Gold stops working/not opening error

  • The program crashes frequently
  • You encounter a black screen often while working on this software
  • AOL Gold is not responding even after you click on it
  • The webpage doesn’t respond even after you plug in the software.
  • Sending and receiving mails become difficult on your AOL account

Troubleshooting Guide When AOL Desktop Gold is not Opening or not working

Here are some quick and simple solutions that you can follow if your AOL software is not working or not opening.

Solution 1: Checking and updating the application

One of the best things about AOL Gold Desktop is that it updates itself quite automatically. There might be an issue with the software. In that case, the updates would not be downloaded. In this case, check manually whether there are any pending software updates that need completion.

Solution 2: General settings

While updating Windows or any other application, there are changes in the computer settings. Such changes can induce errors and can lead to AOL Gold not working properly. Since these changes affect the functioning of AOL, you should try to restore the computer to an earlier setting when the AOL was working properly.

Solution 3: Checking the Add-ons

Some add-ons installed on your system could be affecting the working of AOL Desktop Gold. It could also cause the system to have incompatibility issues with AOL Desktop Gold. The prudent thing to do is to disable these add-ons. After that you have disabled these add-ons, you should run a scan of your system to diagnose the issues.

Solution 4: Downloading the installation file

When you get the message displayed on the screen, “AOL Desktop Gold has stopped working or not opening,” you can follow the steps mentioned below for downloading AOL Desktop Gold and running an updated installation file:

  • Access the AOL website and download the updated installation file.
  • Next, you need to open the file and run it on your system
  • Now, Go to the AOL icon and open Desktop Gold after you have run the installer.

Conclusion:

We have tried to suggest the best possible solutions for you. We hope that the solutions we have provided above are of good use to you. If you keep following these steps, there is a good chance that your issue might get resolved. However, there are times when even after employing these steps, people are not able to get the resolution. Finally, you are welcome to connect with us. Although, Our skilled team of executives can help you with your issues and can provide you with the required assistance. Do chat with us or shoot us a mail . We’d be happy to help!

How to Enable Port Forwarding on Netgear Nighthawk Router?

To Enable Port Forwarding on Netgear, you can dial our given toll free number. Your Netgear Nighthawk router has a firewall that prevents your home network from unauthorized access. It blocks all the connections that were opened for a game or some other application.

Dial Toll Free Number : +1-855-362-0770

An Overview of Netgear Nighthawk Router

The procedure in which a port is opened is called Netgear Nighthawk port forwarding because, in this process, you forward a port from the internet via a firewall and direct it to the device in your home network. If you can’t able to enable the port on the Netgear nighthawk router, you must call Netgear customer service to resolve it quickly.

Steps to Enable Port Forwarding on Netgear Nighthawk Router

  • Configure an IP address on your computer or device on which you wish to forward a port.
  • Log into your Netgear Nighthawk R7000 router.
  • Move to the port forwarding section.
  • Click on the link of advanced.
  • Now, select the link of Advanced Setup.
  • Choose port triggering or port forwarding.
  • Press on the radio button of port forwarding.
  • Then, click on the button of Add Custom Service.
  • Make a forward port entry.

Some Other Procedures to Enable Port Forwarding on Netgear Nighthawk Router

It looks so difficult, but there is nothing to worry about. Furthermore, we will help you walk through all the steps you need to perform for Netgear port forwarding.

Solution – 1: Set Up a Static IP Address

It is imperative to set up a static IP address in the device to which you are going to forward a port. Hence, This procedure will make sure that all your ports are open even after restarting the device.

Once you are done setting up the static IP address, the next thing that you need to do is to log into your router.

Solution – 2 : Login to Netgear Nighthawk R7000 Router

Now, you are going to log into your Netgear Nighthawk R7000 router. Your router has an interface that you can use to access the settings of your router. First, access the internet browser of your choice and then enter your router’s IP address in the location bar.

The default Netgear Nighthawk IP address is 172.16.0.1. If you changed your router’s IP address, you need to enter that IP address. After entering the IP address in the URL section, then click on the search icon.

After that, a dialogue box will appear before you, where you will be required to enter the username and password of your router. The default username of your Netgear Nighthawk R7000 router is admin, and the default password of your Netgear Nighthawk R7000 router is password.

Please enter the username and passwords in their respective fields and then click on OK. Finally, you will be able to log into your Netgear Nighthawk router.

Solution – 3 : Enable Port Forwarding

Furthermore, to enable port forwarding on the Netgear Nighthawk router, start searching for the port forwarding section of your router. For this, you will have to open the Netgear Genie page.

Select the Advance tab that is available right after the Basic tab. Take a look at the sidebar on the left. Select the option of Advanced Setup. This selection will open up the new menu. Now, select the option of Port Triggering or Port Forwarding.

Conclusion

Finally, move ahead and put a dot in the radio button labeled as port forwarding, close to the top of the page. After that, click on the control of Add Custom Service given at the end of the page. After moving through the above rectifying procedure, you must dial the Netgear technical support team to access it immediately if you can’t connect to the Netgear nighthawk router.