Ultimate Guide to Fix Netgear Router Connecting Problems

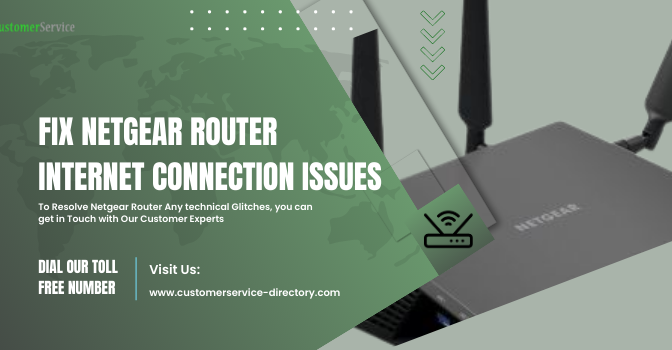
Suppose you are preparing to work on your computer on some specific task, but your Router stops working. Now, you don’t know what to do? You are stuck in an unwanted issue, and you don’t know how to come out of it. The same problem is encountered by Netgear router users, where their device is lost its connection to the Internet due to some router error.

An Overview of Netgear Router Connection Issues

So, how to fix this? Now, rather than running behind the solution, the first thing you need to do is look for the causes of this problem. But if you get frustrated because you can’t diagnose the Netgear router not getting internet problems properly, then you can read this blog and grab your answer.

How to Setup Netgear WNR2000 Router?

Why is Netgear not getting Internet?

There can be multiple causes of internet issues in Netgear Router; let’s discuss about a few common ones:

  1. You are using outdated firmware.
  2. Radial signals are disabled.
  3. There is some issue with the Netgear Router itself.
  4. Loose cable connections.
  5. Interruption in the Power supply.
  6. The Internet is down.
  7. The firmware has blocked the internet connection.
  8. Router is facing technical glitches.

What are the ways to Fix Netgear Router not getting internet problems?

After collecting all the important information about the Netgear Router, let’s understand the best ways to fix the issues:

1st Step: Reboot your Networking device

To fix the major issues, simply restart the Network Device. The same works for Netgear Router as well; simply restart the Modem and Router and check if the problem is fixed.

  1. Initially, you have to search for the Power button in your Modem and Router.
  2. Thereafter turn off the power button of the Router, and turn off the device as well.
  3. Now, switch off the power button of the Modem as well, then wait for some time.
  4. Turn on the Router, and wait for the status light to be stable.
  5. Thereon, wait again for the modem status light to get stable in the appropriate color.
2nd Step: Power Cycle the Router and the Modem

Alternatively, you can also try to Power Cycle your Router and Modem.

  1. In the beginning, Press the power button to switch off the Router and Modem.
  2. Now, unplug all the Ethernet Cables/ COAX along with the power cords. You also have to unplug the cables that connect your Modem to the Router and the wall outlet.
  3. Now Repeat the process for the power chords of the Router and the Modem.
  4. Now, let the device rest for some time.
  5. Moving ahead, input the cable from the wall outlet into the Modem.
  6. Now, plug in the power chord and turn on the device.
  7. Wait for sometimes, until the light comes to a stable position, then plug in the power chord of the Router.
  8. Thereon, you have to connect the Router and Modem through an ethernet cable and then turn on the Router.
  9. Again wait for a few seconds for the router lights to be stable, and then verify if the device is connected to the Router now.

Netgear Router Connection Issues

3rd Step: Reset the Netgear Wireless Router

If the above two methods don’t work for you, then you can try re-configure your Netgear Router.

Note: Before initiating the process, keep a paper and pen by your side.

  1. Check the back of your Router, and Press and hold the reset key for almost 30 seconds.
    Note: To reset your router you can press the reset key, which signifies with blinking of all the lights.
  2. Now, restart your Modem and Router.
  3. After that you can use your router as a new one.
4th Step: Look for Damaged or Loose Connection

If your Netgear Router is not getting Internet after resetting, then you have to check for any damaged connection. If you find one, fix it immediately to get rid of the issue:

  1. Router and Modem which connects to the Power chords, check it properly.
  2. Apart from that, keep an eye on Power fluctuations.
  3. Also check ethernet cables which connects to the Netgear Router and Modem
  4. Now, check the connection of coax cable quality which connects to the wall outlet and Modem.
  5. In case you find any damages, you have the option to change the older coax or Ethernet cables to a new one.
  6. Furthermore, if you want to know if the splitter is the reason behind the issue, you can connect the cable from the wall outlet directly to the Modem. Now, if the modem light is blinking perfectly, then the coaxial splitter is at fault, and you need to replace it immediately.
5th Step: Factory Reset the Router

To delete all the data & settings present in your device, you can proceed with Factory Reset Option. This will remove all the conflicting settings of the Router, and you can start from scratch:

  1. Firstly, check that the Netgear Router’s power light is on.
  2. Thereafter look for the Restore Factory Settings or Reset button. At the back of the Router.
  3. Now, utilize a paper clip to press and hold the Reset button for almost seven seconds.
  4. End the process by releasing the reset button.

Still facing the Netgear Router not getting internet problems? 

If you tried all the above mentioned steps, but your Netgear Router Internet Connection issue is still not resolved, then call on our Toll-Free Number +1-855-362-0770. Apart from this, you can also use the live chat box (Help) given at the bottom of the page to explain your issue and grab assistance accordingly.

Roku Not Working – Solutions to Common Startup Issues

Having trouble while using a Roku device, well, a lot of reasons can be there due to Roku not working properly. Common issues can be connection issues, unresponsive remote control, or just the device has simply hanged/freezing and working playing anything.

An Overview of Roku Device Not Working

While some issues can be troubleshot by the users by themselves but for some, you need to contact Roku Customer services. Here we will discuss some common causes due to Roku not working properly, along with some measures that you can take to fix them. Roku is among the Top Brands in the states which offer digital media devices.

What to do when YouTube not Working on Roku?

Users with a Roku device can play any offline digital media they have with them, or they can stream online on various OTT platforms. Any issues with the Roku device at the last moment can disrupt the whole weekend schedule of any series lover or cinephile. In that case, you should be able to troubleshoot the Roku device issue. Read the article further to learn some basic troubleshooting for Roku Devices.

Common Issues faced by the user while using Roku Devices.

Following are the various causes due to which your Roku not working properly

Power Issues or Connectivity Problems

One of the major causes of Roku devices or Roku remote not working is dead batteries. Apart from that, another major cause is the signal that the device is receiving from the router might be blocked. To fix that, you need to change the batteries and also fix the router or the device at a favorable position in order for the device to receive the signal without any hinder.

Roku Device Might Have been Heated Up

Sometimes when you are using the device for a long time without any break, your device may get heated up and become unresponsive. Thus you need to switch off your device at regular intervals. Also, running the Roku device continuously might permanently damage it.

Other Technical Issues like Audio/Video Settings

Following are some technical issues which you face while using Roku Device:

  • You have not updated the Roku device software. Because of this, it is not functioning properly.
  • Common problems when you play Roku devices like audio and video improper synchronization.
  • An issue with the Wi-Fi router settings.
  • Video quality could be better, even with a strong internet connection.
  • Some of the streaming apps which are available under Roku devices are playing.
  • Problems while playing 4k video with a Roku device.

How to fix Roku Device when not working properly

Various troubleshooting measures can be taken in order to fix Roku Device. Some of them are listed below:

Adjust the Wi-Fi to properly connect it with the Roku Device

You need to adjust the Router in a favorable position so that the signal is not blocked while connecting with the Roku device. Apart from that, in the case of low signal, you can reset the Wifi router or disconnect other devices in order for the Roku device to receive the full bandwidth.

Try to Reconnect your Roku Device with Router Again

Before you try, you need to check first whether your internet connection is active or not. For that, you need to follow the given steps:

  • Start your Roku Device, and on the screen, navigate to the settings from the side menu. You need to press the left on the remote.
  • Now, in the settings, you need to go to the Network page. There, go to the “About” section.
  • On the About page, you can get your network connection details like IP Address, Mac Address Details, signal strength, wireless channel status, and downloading speed. You need to check here whether the internet connection is active or not.
    In case you are not connected to the internet, then follow the given steps:
  • On the Roku home screen, open the settings from the left-hand menu.
  • From the settings, go to the network page. There, you can find the option “Set up Connection.”
  • Select “Set up connection” and then wireless, and afterward, OK.
  • Make sure that your wireless router is in range. Once detected, it will be shown in the list of available devices.
  • Select it and fill out the credentials and then select OK.
Update the Roku Software 

Sometimes the Roku not working properly due to the software not being updated on it. In order to update your Roku Software, you need to follow the given steps:

  • Open your device, and then on the home page, navigate to the settings.
  • In the settings, choose System and then System Update.
  • Select “Check Now” in order to look out for any pending updates.
  • In case of any pending update, it will automatically start working on it.
Restart the Roku Device, or Factory Reset the Roku Settings Again 

This is the first precautionary measure to restore the Roku device which is not working properly, for which you need to follow the given steps:

  • Open settings from the Roku homepage.
  • In the settings from the left-hand side of the page, you find the option “System Restart” and then select “Restart.”
  • Now press OK, which will restart the system.

In case restarting the Roku device does not work, then you need to reset the factory settings.

Following are the Steps which can Help you to Reset Roku Device Settings:
  • You need to open settings in your Roku Device to start the factory reset.
  • Now in the settings, select Advanced System Settings.
  • There you can find the Factory Reset option. Click on “Factory Reset Everything”
  • Enter the device code to authenticate and press OK to start the factory reset.

How to Fix the “Roku Remote Not Working” Issue

Sometimes it is not the player who is not functioning properly, it is the remote device. In troubleshooting your Roku remote, you need to take the following steps:

Check for the Remote Batteries

This is the very first and basic step to do when your Roku device is not working properly. Check for the batteries to see if they are working or not, and in case not, then change them immediately. In case the batteries are corrosive, then you need to clean the Remote device and then change the batteries.

Adjust the Position of Your Roku Device

Because of the comfort issues, you might be using Roku Remote from a position where it is not reachable to the player device. To fix that, either you need to change the position of the device or change your position.

Remove any Headphones from the Roku Device or Remote

This is a commonly noted issue where you are unable to use a Roku device when the remote get connected to the headphone. Although any particular cause, disconnecting the headphone with the remote sometimes troubleshoot the issues. First, you need to unplug the cord, and after that, wait for 30 seconds. Now remove the batteries, and after that, try to run the device again.

Use an HDMI Extender in Case you are Using a Roku Stick

A user using a Roku stick can face issues with their Roku device due to interference as they need to connect the Roku Stick to the HDMI port. To resolve this issue, you need to use an HDMI extender.

Instead of Remote, Opt for Roku Virtual App

In case you are still unable to fix your Roku Remote problems, you can download and install the Roku Virtual app through which you can control your Roku device even from a great distance.

Roku Customer Support 

In case you are unable to troubleshoot your Roku device by yourself, you can contact Roku’s official customer support services from the official Roku support page. There you need to select the device you are using. After that, you can contact Roku customer support through the calling process or the live chat. Apart from contacting the support agent, you can check out various troubleshooting blog which provides enough information on common Roku Device issues.

You can also reach out to us in case you are facing any delays or unable to reach the official Roku support agent. Our technical team is available 24/7 to assist you with any issue you are dealing with Roku device or any other online service you have.

Wrapping it Up

In the above discussion, we have provided you with all the possible causes of why your Roku device is not working properly and how you can troubleshoot some common issues. In case you have any doubts or queries, you can reach out to us from the number given below or the live chat option. Just mention your query, and our support agent will provide the desired solution in the minimum time possible.

What to do when YouTube not Working on Roku?

Sometimes, we are not that lucky, as YouTube on Roku is not working.

An Overview of Youtube Not Working on Roku

You can understand this situation by the following scenarios so that you never ignore it by thinking it is a minor error.

  • You are unable to launch and play any of the YouTube videos.
  • When YouTube wouldn’t work on Roku by any method.
  • In case of not logging into your YouTube account.

These errors occur at any time without prior notice, so if you witness any of the above-stated situations, then understand that your YouTube is not working on Roku.

How to Fix Yahoo Mail Notification Not Working Problem?

Probable Reasons for the YouTube App on Roku not Working

When your YouTube app on Roku is not working, multiple causes exist for the same. Refer to the list of the causes highlighted below:

  • No Internet connection or slow speed of it.
  • Issues and glitches in the YouTube account problem.
  • Flaws in the procedure of the Roku app.
  • Presence of the outdated version of the Roku app.
  • When the server of the YouTube app is down.

Before moving forward to the troubleshooting methods for the same error, let’s get introduced to Roku first. It may be unfamiliar to several people, thus briefly explaining it.

Roku is not anything but a brand of hardware digital media players of an American company. You can easily stream entertainment means on your TV or any other device with the assistance of Roku. You can make your Home a smarter one in this way. Roku supports nearly every video streaming channel not part of the Roku family. You can simply stream Netflix and Hulu here. But the most famous one is YouTube because it has an immense library and a playlist of videos of every niche.

Ways to Rectify YouTube not Working on Roku

Multiple ways are specified that are apt to eradicate the existence of the proposition, i.e., the YouTube app on Roku not working. So, go through them attentively and apply those steps whenever you encounter the mentioned issue.

1st Step: Look Out for the Server of YouTube

It is better to examine and take some of the little measures to fix the YouTube problem on Roku than to look out for a reason. Run a quick test to inspect whether you are the only one facing the problem or if it is happening to everyone. For this, you have to open the YouTube Status page at Downdetector or you can also search on the browser “Is YouTube Down”. Through these both ways, you can know whether or not there is some issue with the YouTube going on. If it is going, then wait for some time and then try again.

Scrutinize whether YouTube is Working on other Devices or Not:

By positively checking that YouTube is not down, proceed further to check whether YouTube is working on other devices. It will help you to rectify the issue of YouTube on Roku not working. Besides, it will clear the confusion about whether your Roku is running properly or not or whether the problem resides in your Internet connection. So, check the YouTube process on another device you have.

Check for Internet connectivity along with Internet speed:

The YouTube app on Roku might not work due to bad Internet connectivity or slow Internet speed. You can check it by running YouTube on all other devices in your Home. Try to start your Wi-Fi, router, or modem again. Check the speed of your Internet as there are various free services available through which you can do the same. The preferable speed should be 7 Mbps to watch the video in HD quality, and to watch it in 4K quality; the speed should be 25 Mbps.

Get the Update Done of your YouTube

If it gets clear that YouTube not working on Roku is because of some flaws in YouTube, then there are other methods you need to perform. First, update your YouTube on Roku to move forward in this aspect. Take the remote control in your hand, go to the YouTube app, and press the asterisk (*) button. A pop-up will open up, check for the updates and click on it instantly for the update if there appears any. Now try to open YouTube again.

Perform the Act of Restarting Roku Again:

The problem still persists because of the cache stored in your device. To tackle this situation, you need to restart Roku. Place your hand on the remote and

  • Click on the Home button, and select settings.
  • Select the system, and then choose power.
  • After that, click on the option “System restart”.
  • There are options that pop up on the screen asking whether you want to confirm the rebooting process.
  • Click on yes and then hold back till the rebooting of the Roku concludes.
Run a Survey to Look for Roku Updates

Does your mind also get filled with the thought, “are you using an outdated version of Roku?” or “Are there any updates of Roku waiting to get installed?”. It is a huge possibility that your Roku contains glitches or snags due to the outdated version, preventing YouTube from working on Roku. So inspect for any update that is available for the system through:

  • Handle the remote control, go to Home, and
  • Then make your click on the settings tab.
  • Pick the option of the system and then the system update.
  • In case you find that there are some updates available there,
  • Then you should install them promptly.
Install the YouTube app again

If you find yourself in a state where all the above-given solutions fail, then uninstall and install the YouTube app again. Doing this will help you eliminate all the cache data of YouTube. Hence, to perform this, you need to select the YouTube app from the name of the apps present on the Roku screen’s Homepage.

  • Then, go ahead and click on the asterisk button (*).
  • Click on the option Remove channel and then click on Remove again.
  • After this, the app is gone. So, visit the Roku channel store and reinstall a new edition of YouTube.

Most of the time, it happens that YouTube on Roku is not working get fixed without any obstruction.

Final words..!

Even after applying all these steps mentioned here to rectify YouTube not working on Roku, if the problem persists, call us. You can directly get in touch with our professionals by calling +1-855-362-0770, and they all are present to pick up the number every time and to assist you. Our professionals are so skilled that firstly they understand the issue’s complexity and then provide you with a solution.

QuickBooks Error Code 111

There are certain instances when users might confront QuickBooks Error Code 111 while trying to generate and store the data backup. Also, it may trigger while accessing the unsupported version of QuickBooks. Whenever the error occurs, it obstructs the backup process and prevents the users from data security.

If you are also dealing with the QuickBooks Error 111, don’t be disappointed. Instead, have a quick overview at this post and get rid of the issue instantly.

Are you fed up of continuously receiving QuickBooks Error Code Skipped 111 and need immediate help? Call us at +1-855-362-0770 and connect with our professionals who can assist you with your problems. 

What Exactly do you understand by QuickBooks Error Code 111?

QuickBooks Error Code 111 is one of the most annoying and complicated errors that interrupts the users from creating the company file backup. Whenever the error occurs, it hampers the ongoing tasks and create hindrance while keeping your data secure.

Generally, users might encounter this issue while running the Verify Data tool on your company file. However, move towards the next section to gain a better understanding about the origins of the error, symptoms, and resolution methods to overcome the problem.

Read Also – QuickBooks Payroll Update Error 12152

What Lands You In QuickBooks Backup Error 111?

Here is a list of all the factors responsible for the occurrence of QuickBooks Error Code Skipped 111. These are all of the probable root causes that might trigger the issue. Read all of the causes carefully to apply the troubleshooting method accordingly.

  1. The company file name includes more characters i.e., 65, including the extension.
  2. Utilizing the QuickBooks Desktop of the version that is currently not available.
  3. It may also occurs due to corruption or damage in the QuickBooks company file.
  4. Sometimes, it may appear when the folder containing your company file is unavailable.

Instances When You Experience QuickBooks Error Code 111

Below we have stated some of the signs and symptoms using which you can easily identify QuickBooks Error Code Skipped 111.

  1. Sometimes, it may prompt when the user doesn’t get enough time to prepare the backup of the company file. Moreover, all your crucial data from your system gets erased.
  2. QuickBooks Desktop may stop responding or may start freezing suddenly.
  3. You might experience that the Windows started crashing irregularly.
  4. Errors in the system might obstruct other systems and devices with the field and folders. Thereby, it hampers the overall work and function of the system.

Read Also – Easy Methods to Fix QuickBooks Payroll Update Error 15243

What Should Be Done to Resolve QuickBooks System Error 111?

This blog section will guide you with the proper instructions to troubleshoot QuickBooks Error Code Skipped 111. If one doesn’t help you resolve the issue, skip to the other one and follow the given order of solutions closely.

Remedy 1: Use the Rebuild Data Tool On the File

As the error might evoke after running the Verify Data tool, you must try using the Rebuild Data tool. This is so that any problem detected via Verify Tool must get resolved immediately using the Rebuild tool.

  1. Initially, move to the QuickBooks File menu and opt for the Utilities option.
  2. Soon after that, you must choose the highlighted Rebuild Data.
  3. Next, tap on the OK button when the program prompts you to generate a company file backup.
  4. Now, pick a suitable location to save the backup of the company file.
  5. Consequently, the tool will start running on your system and let the process complete.
  6. Furthermore, when you get the message indicating “Rebuild was completed”, hit the OK button.
Remedy 2: Make the Necessary Change in PayCheck and Run the Verify Rebuild again 

In this resolution method, we will make mandatory changes in the paycheck causing the issue and revert it back to the original one. This will refresh the contents on the check and run the tool again to verify that everything is working in good condition.

  1. Launch the paycheck in QuickBooks and verify proxy or server changes in your check.
  2. For instance, if you want to make some changes in the Payroll Items, hit the Paycheck Details.
  3. After this, click on the OK > Save & Close button to proceed further.
  4. You can also view all your list of transactions consequently.
  5. In order to make some essential changes, select Yes and then the Save option.
  6. After making all the required changes, you must perform all the above steps again to return to the original figure in pay checks.
  7. Store this file, and it is advisable to maintain the backup of your company file.
  8. Exit from all the processes running in the background and opt for the File tab.
  9. Finally, run the Verify and Rebuild Data Tool on this file and verify if the error persists.

Read Also – QuickBooks Error Code 15106

Wrapping It Up!!

Fixing the QuickBooks Error Code Skipped 111 is a hectic and complicated task until you get the proper resolution methods to tackle the issue. After reading this entire post, we assure you that you have gained immense knowledge regarding how to fix the issue. If the error creates issues while generating the backup, then connect with our experts. You can have a one-to-one consultation with our professionals anytime to attain the best working solutions to overcome the issue.

QuickBooks Search Is Not Working

Is your QuickBooks Search not Working? Remembering dates regarding your purchases, or even want to get your queries answered? QuickBooks Search provides you with an easy way to pursue any of the above issues. We now have an easy search and find icon where one can easily access any account-related details or transaction simply by putting the details on the software.

Now, coming to the whole issue of QuickBooks Search Not Working, which is real trouble as it can also sometimes lead to the system hanging in the middle of the searches. Not only this, but as a user, you are unable to search for your desired list of transactions, but it can often cause hassle in putting entries at the time or dealing with customer files and much more. In this article, you will read about what leads to the QuickBooks Search Not Working and the ways to fix it.

Need immediate assistance with the “QuickBooks Desktop search is not working” issue? Contact us by dialing +1-855-362-0770 and get help in no time.

What Does QuickBooks Search Not Working Actually Mean?

QuickBooks is an efficient accounting application that has many incredible features that can save you time and reduce your efforts in accomplishing a task. QuickBooks search is also one of these features that comes with amazing benefits. You can utilize this feature on a daily basis to find transactions, company files, customers, and your preferred data.

In response to your search through the search option, QuickBooks will present the desired results. However, after updating QuickBooks to the latest release, you may notice that the search option is not working. In such a situation, you will have to look for these items manually in QuickBooks.

Read Also – QuickBooks Error Code 111

Possible Reasons Behind QuickBooks Search Not Working Issue

One of the reasons why the QuickBooks Search is not working can be because of the outdatedness of the product. Another reason can be that there can be a registry issue in the windows OS which can further hinder the search button to not work in order, or there can be a firewall obstruction in QuickBooks which can automatically create this hindrance. The main reasons behind the error are stated in the below-given list:

  • Windows OS Registry error is one of the main reasons behind this error.
  • Your Windows Firewall or Third-Party Firewall applications interrupt QuickBooks, thereby causing the QuickBooks search is not working error.
  • Using an outdated version of the QuickBooks application.
  • Damage in QuickBooks Search Index file.

How To Troubleshoot The QuickBooks Search In Not Working Issue?

Let’s discuss how to fix the QuickBooks search not working error:

1. Rename The Particular File

If you are facing this problem of the QuickBooks Search not working, what you can do is rename the file name of the particular company or enterprise. Sometimes, there can be an error in the search index file, and by re-titling it, this query can be resolved.

2. Re-install the App

Another solution to the QuickBooks Search not working can be to completely uninstall the app and then re-install it again. This will provide a clean slate to the software and will remove any strange activity in the software. This step will hopefully fix any bugs and will get it started in no time.

  • Click the Start button and go to the Control Panel.
  • Next, go to Programs and Features and select QuickBooks from the list.
  • Now click Uninstall, and once done, download a new QuickBooks package.
  • Once the download is finished, double-click the executable file and perform the on-screen instructions carefully to install QuickBooks.

Read Also – How to Reconcile in QuickBooks Online

3. Disable the Firewall

If you find any firewall in your system, you will have to disable the option from the settings, as it can be one of the reasons why your search icon is not working. If there is a windows firewall, then you can easily disable it from the control panel in the settings, but if there is any other third-party firewall involved in your system, you will have to read instructions from their origin or website to get it resolved from the source. Check the below-given steps:

  • If you have an in-build Windows Firewall, turn it off temporarily by selecting the option underneath the Control Panel and then try to use the Search feature.
  • When in Control Panel, go to the System and Security section.
  • Next, select Windows Firewall to launch its Settings.
  • Mark the checkbox for the Turn off Windows Defender Firewall option and click OK to implement the changes you have made.
  • If you have a third-party firewall, find the instructions to disable it and try using the QuickBooks search function.
4. Get Professional Help

If you find your QuickBooks Search not working despite all of the above fixes, then what you might want to try is to fix the registry of your windows operating system. Whenever the search option is not working due to the registry problem, it is always advisable to go to a professional for help to resolve this issues..

Read Also – How to Delete Duplicate Transactions in QuickBooks Desktop?

Summing It Up!

QuickBooks search is an incredible feature in the program that can make your day-to-day search easier. If it doesn’t work properly, you will need to invest additional time and effort to find various items in QuickBooks. However, we have explained some effective solutions to use this feature back in the program. If you need additional assistance in the troubleshooting process, get in touch with us using our contact channels, such as email, chat, or helpline number.

QuickBooks Running Slow in Multi-User Mode

Some time Quickbooks Running Slow and it may interrupt your important work .Unable to use QuickBooks software efficiently in multi-user mode? Sometimes, while running a company file or working on a desktop application, QuickBooks running slow in multi-user mode. If the software is running slow, it cannot be very pleasant for you, and it may even disallow you from completing the accounting tasks. Therefore, it becomes important to understand the possible causes behind the “QuickBooks Running Slow” issue and the troubleshooting steps to terminate it. This post will cover in-depth about the QuickBooks running slow error.

“Get quick assistance in troubleshooting QuickBooks running slow issue by getting in touch with our QuickBooks experts by placing a call at our toll-free number, i.e., 1-855-362-0770.”

Why QuickBooks Running Slow Issue Encounters?

Let’s understand the possible reasons and factors due to why a user may face the QuickBooks running slow issue on their device;

  • If too many users are accessing the company file simultaneously, it can slow down the operating speed.
  • When the QuickBooks server fails to detect the IP address of your system.
  • The damaged network interface card can also lead to QuickBooks running slow issues.
  • The host system, where the data file is stored, couldn’t perform faster.
  • Anti-virus or firewall settings block the browser from connecting with the server.
  • The database server is not granted permission to access the company’s files.
  • Incorrect windows file permissions.
  • If there is a large report running in the data files, it can slow down the QuickBooks operation speed in multi-user mode.

Read Also – QuickBooks Search Not Working

Solutions to Troubleshoot QuickBooks Running Slow in Multi-User Mode

After having a clear idea of the possible reasons why a user may face encountering the issue, let’s take a look at the troubleshooting solutions that you can execute step-by-step to get the issue terminated;

Solution 1. Run QuickBooks File Doctor Tool

The first step you should follow to troubleshoot QuickBooks running slow is using the QuickBooks file doctor tool. It is a repairing tool that will help you to fix various issues related to the QuickBooks files.

Given below are the steps that you can execute to run the QuickBooks file doctor tool on your device;

  • To use the QuickBooks File Doctor tool, you have to install the QuickBooks tool hub on your device.
  • You can download this tool from the official website of QuickBooks products.
  • As you have downloaded and installed the tool on your device, move to the desktop screen on your device.
  • After that, double-click on the QuickBooks Tool Hub icon to launch it.
  • As the QuickBooks tool hub opens on your device, click on the “Company File Issues” option, which is available in the green color box.
  • Now, the repair process will commence on your PC.

Once the process ends, launch the QuickBooks desktop application, and check whether the slow-running issue has been resolved. In case the error persists, then try the next solution.

Read Also – QuickBooks Error Code 111

Solution 2. Manage your QuickBooks Data Files

Let’s take a look at the steps that you can follow to manage the QuickBooks data files to resolve QuickBooks running slow issue;

  • Firstly, reduce the date ranges of big reports and files.
  • Thereon, decrease the number of shared users by using only one module simultaneously.
  • Save the data files on the PC with strong internet connection.
  • At last, replace the damaged or slow-working Network Interface Card (NIC) with a new one.
Solution 3. Add “.old” at the end of QBWUSER.INI File

The next solution you can follow to eliminate QuickBooks running slow in multi-user mode is renaming the QBWUSER.INI file. Here are the steps that you can follow to rename the file;

  • Firstly, press the “Windows + E” keys together to open the File Manager on your device.
  • After that, you must navigate to the default QuickBooks location (C:\ ProgramData\ Intuit\ QuickBooks).
  • Enable the Windows to display the hiddden files and folder.
  • Thereon, search for the “QBWUSER.INI” file, and do a right click on it.
  • Next, select the “Rename” option, and add “.old” at the end of the name.
  • Once you are done with the above steps, save the file name, and re-launch the QuickBooks desktop application.

Now, switch to the multi-user mode, and check whether the Quickbook slow-running or not. In case you are still facing the issue, then try the next solution.

Read Also – How to Reconcile in QuickBooks Online

Solution 4. Verify the QuickBooks Company’s File Size

Last but not least solution that you implement to troubleshoot QuickBooks running slow issue is verifying the company’s file size. Given below are the steps that you can carry out to do so;

  • Find the location of QuickBooks company files.
  • Next, right-click on the file with the company’s name, and select the “Properties” option.
  • After that, check for the company’s file size. For the QuickBooks Pro version, the file size has to be less than 150 MB; for enterprise versions, the file size must be less than 1 GB.
  • If you notice that the file size exceeds the desired size, you have to use the QuickBooks condense utility tool to reduce the file size.
  • To do that, launch the QuickBooks software on your PC, and click on the “File” tab option.
  • Now, select the “Utilities” section, and click on the “Condense Data” option.
  • Complete the above steps properly, checkmark the box next to the “Keep all transactions, and remove audit train info to date” option.
  • Thereon, click on the “Next” option, and a pop-up display message showing “Your company file has been successfully condensed” will appear on your screen.

At last, click on the “Close” option and launch the QuickBooks desktop application in multi-user mode to check if the issue has been terminated.

Ending Note

As demonstrated above, we have enlisted four solutions you can execute step-by-step to terminate the issue. If the methods do not help you resolve the error, or if you need any personal assistance, you can contact our team via mail . Our team of QuickBooks experts is available 24*7 at the help desk to deeply understand your query and share the best possible solution.

How to Fix an HP Printer Failure 0x6100004a?

Constantly receiving Failure  0x6100004a message while using an HP printer? Well, that’s a common issue for which the possible cause can be a hardware issue or any technical glitch in the printer, like a problem with the firmware. While this error can easily be troubleshot by the users themselves, they still need guidance on where to start and what to do.

How to Fix Error 49.4c02 on your HP Printer?

Thus, here we have provided all the necessary information which will be helpful for the HP printer users who are facing HP Printer Error code 0x6100004a message while using the printer. HP printers are one of the most convenient printers which are easy to use and thus are preferred by a number of users who have printing as one of the most common tasks in their errands. Any issue with the printer, even a minor, can disrupt the whole working routine of the people. Thus read the article to know how to fix HP Error 0x6100004a.

Common Cause Due to Which You are Receiving HP Printer Failure 0x6100004a

Error 0x6100004a can occur due to both hardware problems and software errors. Following are the possible causes for HP Printer Failure  0x6100004a:

Any Issue with the Printer’s firmware

Using your printer for such a long time without giving the device a break or not using the HP printer properly can create issues due to which the message Error 0x6100004a is indicated on the printer screen. In order to troubleshoot this cause, you need to reset the printer from the start and then try to run it again.

The HP Printer Ink cartridge might have been clogged.

Using printers repeatedly can clog the cartridges and make them unable to work properly, thus giving HP printer Error 0x6100004a on the screen. For that, you need to open the printer and manually check for the clogged cartridges in your HP printer.

The printer Carriage has been Stranded.

The carriage is the main component that holds the cartridges and moves back and forth in order while the paper is printing. Due to any reason, the paper gets stuck in the printing path and thus the carriage stop working, thus giving Error 0x6100004a while using an HP printer. The solution for this problem also involves the manual check-up, where you need to open the printer and check out for any stuck paper in the printer.

How to Resolve HP Printer Failure 0x6100004a

Based on the root causes mentioned, we have provided solutions for each one of them step-by-step below:

Reset the Printer Firmware

You need to reset the HP printer settings, which require you to turn off the printer and rewire all the connections of the printer to the system, including the power sources. Follow the given steps to reset the to fix HP Printer Error 0x6100004a by resetting the printer mechanism:

  • First, you need to turn on your printer and wait for a few minutes until it becomes idle.
  • After that, you directly need to remove the power cord and again wait for a few more minutes.
  • Now insert the power cord and start your printer. You need to wait until the HP printer you are using becomes idle. After that, try to run a test print.
Clean the Clogged Cartridges or Vents in the Printer

If the issue persists after resetting the printer, you need to check for clogged cartridges. Before that, make sure that you have a pin, a distilled water bottle, a cloth, and a cotton swab as prerequisites. After that, follow the given steps:

  • Turn on your HP printer and then open the cartridge access door.
  • Select the cartridge, and press the tab button in order to release the cartridge.  After that, remove it from the printer to check for any clogs.
  • Check for any orange colour tab on the HP printer ink cartridge. if the colour tab is present on HP cartridge, then you need to remove it.
  • Now, on the top of the cartridge near the HP logo, you can check for a clogged vent. In case there is a clogged vent, clean it with the help of a Pin.
  • Now, look out for any collected ink on the surface of the cartridge. Clean it with a dry cloth.
  • Now insert the cartridge back in the printer and follow the same process for another one. Once completed the whole procedure, check if the error persists.
Check for any Jammed Paper in the HP Printer Carriage.

There can be a possibility the HP Error Failure 0x6100004a is displaying on the screen due to any stuck paper in the carriage. To check for this, follow the given steps:

  • Turn off the printer and turn it around to open the rear access door.
  • There, look out for any stuck paper, and if present, remove it slowly and carefully; if the paper gets torn while pulling, then it will be more difficult to remove it afterward.
  • Now restart the printer and then check with a test print.

Contact HP Customer Support

In case you are still not able to troubleshoot the HP printer Error  0x6100004a by yourself from the above-discussed solutions, then you need to contact HP customer support. Follow the given steps to reach out to HP support services.

  • Visit the official website of HP support.
  • There, select the “support” option present at the top of the page. From the drop-down menu, select the printing option.
  • On the new page, you need to type your printer details or select the option where the printer will automatically detect.
  • Now select the option “Still Need Help” and then fill out the trouble you are having along with your mail ID and other contact details. The HP customer team will contact you with possible solutions.

On an Ending Note

From the above-provided information, we hope that you can easily troubleshoot the HP printer failure 0x6100004a by yourself. In case you are facing further issues, you need to contact HP customer support at +1-855-362-0770. In case of delay from the HP customer, you can reach us for further assistance by dialing the number given below or using the live chat. Where we will immediately revert to you and provide the required support for any issue with your HP printer.

How to Fix Firefox Keeps Crashing Constantly on Startup?

Is Firefox crashing Issues also interrupting while opening? Well, the common cause for that can be an installation error or can be some technical issue that many users are unable to troubleshoot by themselves. Thus they need assistance. Mozilla Firefox is one of the best and most trusted web browsers available online on which users can rely on. The reason why Mozilla still exists in the list of top browsers is the constant updates made in Firefox as per the user’s demands.

How to Install an HP Printer without the CD?

However, even after constant updates and various features for providing ease of convenience to the users, errors constantly show up, among which the most common one is when the Firefox web browser starts to crash repeatedly, and users are unable to access the internet. Thus, here we have provided all the information, including common causes due to which Mozilla crashes and common solutions based on which users might be able to fix Firefox’s constant crashing problems.

Common Causes Why Firefox Not Working and Constantly Crashes

The most probable cause due to which the Firefox web browser kept crashing constantly is that you have not properly downloaded the Mozilla installation file on your computer, due to which it is unable to load properly in the system. Other technical causes for Mozilla crashing in the system are listed below:

  • You might not have updated the latest version of Mozilla in your system.
  • Any unwanted or suspected add-ons or extensions in the system can cause Mozilla to crash repeatedly without any cause.
  • Mozilla might crash due to cache files saved in the browser in the background.
  • There might be a chance the browser is incompatible with the security software you are currently using, and due to security concerns, it is constantly interrupted by the Antivirus.
  • You might need to disable the hardware acceleration feature in your web browser.
  • Your system might have some pending updates or drivers to be installed, due to which the operating system is unable to load the web browser.

How to Fix the “Mozilla Firefox Keeps Crashing” Issue

Based on the causes mentioned, you can take the given measure, which is discussed step-by-step, to fix the Mozilla Firefox issue:
Uninstall and Reinstall when Firefox not working
You need to uninstall the web browser from the control panel and download it properly with a stable internet connection. Following are the steps for uninstalling and reinstalling the Firefox Browser :

  • Go to the control panel, and from there, navigate to the section “Program and Features.”
  • After that, click on the option “Uninstall a Program,” after which a list of programs will appear, from which you need to select Mozilla Firefox.
  • Right-click on it and then click Uninstall.
  • Now delete the other remaining folder related to Mozilla Firefox, which still remains even after the uninstallation from the program. You can check for the remaining Firefox files in the “C” drive.
In order to Reinstall, you need to open your default web browser and then type Mozilla Firefox in the search option.
  • From the list of results, select Mozilla Firefox download and click on it.
  • From the official website, you can have the latest version of the web browser and click on it to start the downloading process.
  • Once the file has been downloaded, navigate to the download folder and double-click on the file to start the installation process.
Run an Antivirus scan and check for any Malware or Unknown Application 

You need to run an antivirus scan in your and search for any malware files or any applications from unknown sources. The likelihood of Firefox being crashed by other unknown applications is quite high. Thus check out for any unknown application or virus, and in case you detect one then remove it from the system and try to run Mozilla again.

Update Mozilla Firefox to the Latest Version

In order to deal with Mozilla Firefox not working error, you need to update the browser to the latest version. In order to update to the latest version, follow the given steps:

  • Open Firefox and navigate to the three-bar option on the right-hand side of the window.
  • From the drop-down menu, select the settings option, and after that, go to General Settings.
  • There you can find the option “Check for Updates.” Click on it and wait for a few minutes.
  • After that, two options will be available on the screen from which you need to click on “Restart to Update Firefox.” Make sure you have checked the option “Automatically Install Updates” option.
Clear Browsing History in Firefox browser, including all the Cache Files

A corrupted cache in the browsers can create a hindrance while accessing the internet. In case you want to remove the corrupted cache files from the Mozilla Firefox Web Browser, follow the given steps:

  • Launch the Mozilla browser and then go to the menu icon on the right side of the window.
  • From the drop-down menu, select “History,” and from the side menu, select “Clear Recent History.”
  • You need to select “Everything” from the time range and tick mark on every option, and after that, select “Clear Now.”
  • Now try to run Mozilla Firefox again.
Clear Other Firefox Temporary Files from the system

Now that you have cleared the browsing history in Firefox along with the cache files, you need to remove all the files and folders related to the web browser in your system

  • Open the Run window in your system, and there, type the following command:
    C:\Users\%username%\AppData\Local\Mozilla\Firefox\Profiles\
  • Now, you need to navigate to the folder with “default-release” and open it.  Select all the folder which has the name “cache” in them and delete them.
Disable other Add-ons and extensions from the Firefox Browser
  • Select the menu icon on Firefox, and from the drop-down, select help.
  • From the new window, you need to click on “Restart with Add-ons” disabled.
Update the System Driver

It is necessary to update the system driver for other applications to run properly in it. To check and update the system drivers, follow the given steps:

  • You have to open the device manager.
  • Now open the run prompt, and there you need to type “devmgmt. msc”.
  • In the device manager, you will see the list of devices. There you can see the apps which need a critical update with an exclamation mark.
  • Right-click on them and select “Update Drivers.”

Fix Firefox Crashing Issues on Android

If your Firefox is not working on android, you can take the same measure as mentioned above. However,  You can also manually synchronize on desktop device, then try to run Mozilla on the Android device. Which might fix the Firefox constantly crashing issues on Android.

Firefox Crashing Issues on iPhone

You can offload the Firefox browser application through the general setting of your iPhone, if its crashing on iPhone.

Final Words

After reading this post, you can easily troubleshoot crashing issues of Firefox web browser. From the above discussion, we conclude that the basic measure to fix Mozilla Firefox is to keep your system and browser updated and remove other unnecessary applications from the system. In case you need any further assistance, you can contact us at +1-855-362-0770, where our technical expert will connect with you and provide you required help in fixing any issue you are having not only with Mozilla but any other browser. You can also connect through live chat on which we will revert within a given time with the desired solution.

How to Install an HP Printer without the CD?

Looking for a way to install an HP Printer driver without CD? If yes, then you can follow this blog.

HP is a well-known brand all around the world, and it deals with multiple tech gadgets, one of which is Printers. With its latest features and improved performance, HP Printers are the most selling product of the company.

How do I Fix HP Printer Validation Failed?

An Overview of Installation of HP Printer Driver 

To access the Printer, a user first has to install it, and one can do it in many ways. However, in this write-up, we will show you two processes for installing an HP Printer Driver without a CD or Installation Disk.

In case you want to opt for instant assistance to install HP Printer Drive. Dial our toll free number +1-855-362-0770 and receive immediate help.

Methods to Easily Install HP Printer Driver without CD

We have listed down the easiest methods to install HP Printer Driver without CD on different devices. The below methods has been tried and tested and originally written by someone who has faced difficulties installing the printer without CD, even if the mentioned methods is not working for you, then call our expert on the above mentioned toll free number.

Method 1: Steps to Follow to install HP Printer using a USB cable.

For the manual installation of the HP Printer driver, you can try USB Cable. However, the process is different for both Mac and Windows devices.

For Windows Devices
  1. Initiate the process by plugging the USB Cable into your System.
    Note: In case your Printer doesn’t come up with a USB cable, then purchase one so that you can install the Printer.
  2. Thereafter Switch on your Printer by pressing and holding the Power Button.
  3. Now, hit on the Start button, and select the Windows logo present at the bottom of the screen.
  4. Moving ahead, enter Printers & scanners in the Search box given below.
  5. Next, tap on the Printers & Scanners tab, and look at the top of the screen to select Add a Printer or scanner option.
  6. Now, choose your Printer’s name, and after this, the HP printer driver installation process will begin.
  7. Here you have to follow the overall on-screen installation instructions to complete the process.
For Mac Device
  1. Firstly check if your Mac device is compatible with the HP Printer.
  2. Now, ensure that the System is close closer to the Printer, as the USB Cable length can be short.
  3. Check and verify that you have a USB adapter by your side for any emergency.
  4. Now, begin the process by plugging the printer cable into the Mac device.
  5. Thereafter press the power button and hold it for sometimes, to switch on the System.
  6. Next, hit the Install button and follow the on-screen steps to complete the process.
Method 2: Steps to Follow to install HP Printer through Software.

Before moving ahead with the installation of the Printer, you first have to read the Manuals that come with it. In that manual, there must be a section that will tell you about the Model Name, Number, and software-supported software. By using it, you can download the HP Printer driver in your System very easily.

The steps to do so are mentioned below.
  1. Read the overall Printer’s Manual. The instructions mentioned in the user manual can help you understand the Printer and fix its issues in a better way.
  2. Thereafter, check the Printer’s manufacturing website, i.e., http://www.hp.com/  in the case of HP Printers.
  3. Now, hit the Printers options, and look for your Printers model. Scroll down through all the Printer models to choose the one you have, or enter your Printer Model in the search box to complete the process.
  4. Next, find the software Download link, and re-enter your printer model in the search field.
  5. Moving ahead, select the download link for your Printer’s software.
  6. Here the download process of the software on your System will begin.
  7. Wait for sometimes so that the Printer’s software will get Downloaded to your System.
  8. Now, hit Save Location.
    Find Your Downloaded Software
  9. In case you are using a Windows device, Unzip the software’s folder by double-clicking the folder, followed by double-clicking the Setup file, and tapping the Ok button.
  10. Now, you have to select a location and hit the Exact Here tab to complete the Unzipping Folder.
    Note: Mac users have the option to open the folder by just double-clicking on it.
  11. However, if the software is already unzipped on your device, you can skip this part of the procedure.
  12. Again double, click on the Software setup file.
    Note: Windows users have to open the unzipped file first, then proceed further by double-clicking the EXE file present there.
    Whereas Mac users can just double-click on the setup file to utilize it. In case you are a Mac user with MACOS Sierra, then it might be possible that you might have to verify the software first and then continue with it.
  13. From here, you have to follow all the on-screen instructions to complete the process.
  14. At last, Try to connect your Printer via Wi-Fi or USB Cable according to the features of your Printer.
  15. Now check if the Printer is working properly using the Print Command.

Summing it up!

We assure you that after gathering all the mandatory details, you will easily install HP Printer Driver. However, if you find any difficulty while doing so, you can contact us anytime; just drop a mail, and an expert will revert you with a step-by-step solution to your issues.

How to Install Norton Antivirus on Mac Computer?

Norton Antivirus is one of the best Antivirus available in the market for users who wish to protect their computer from viruses or malware files that can be sent or reach your system through any means possible. The most promising feature of the Norton is the secure VPN network and safe cloud backup through which you will be secure while browsing online, and the antivirus will protect your data other websites. Although Norton is easy to download from the official website and install on the system, users sometimes face issues with that. For these users, we have provided an A-Z guide on how to download and install the Norton Antivirus; after reading user won’t face any trouble or issue while installing the Norton Antivirus.

How to Fix Norton 360 unspecified error Uistub.exe?

Subscribe to Various Norton Products and Services

Before you download Norton Antivirus on windows and Mac or any other device, you need to select and subscribe for any particular product, which after providing your payment details, will be automatically added to your account, and then you can download the specific product. In order to subscribe to Norton Products and Services, follow the given steps:

  • Visit the official website of Norton. There, on the homepage, click on the option “Product and Services” on the top of the homepage.
  • Once you click on the drop-down menu will occur with the list of various products and services.
  • You can click on any of them to get complete details for each product based on which you can choose your product.
  • Once you have decided which product you need, click on the product, and on the new page, select subscribe now.
  • Now, you need to sign in with your Norton account. If you do not have one, you can sign-up with your email account.
  • Provide your payment details. After payment completion, you will receive a confirmation mail along with the product key of your Norton Product.

How to download Norton Antivirus on Windows and MacOS

Downloading the Norton antivirus is a clear and easy process for every operating system as it involves a few basic steps. All you need to have is a registered email ID. Following are the basic steps to download Norton antivirus on Windows and Mac, and other devices.

  • Visit the official website of Norton Antivirus.
  • You need to sign in with your email and password.
  • Select the product which you need for your device security.
  • Now select the device on which you wish to download the Norton Antivirus.
Download and Install Norton Antivirus on Windows 

For Microsoft windows users, there are two options, i.e., either they can download the Norton Security official website or from the Microsoft store. The process for both ways is discussed step-by-step below:

Download and Install Norton Antivirus on Windows from the Official Website
  • You must visit the official Norton website, where you must sign in with your Email ID and password.
  • Once you have signed in, you can see the available products for you to download.
  • Select the product, click Download, and after that, click on the option “Agree and Download” on the new page. The download will start automatically.
  • Now either you can directly open the file from the browser download or navigate the system download folder to find the downloaded Norton file. Either way, locate the Norton Antivirus installation file and double-click on it to start the installation process.
  • Once you have clicked, a pop-up window will appear titled “User Account Control Window.” where you need to accept the terms and conditions.
Download and Install Norton Antivirus on Windows from the Microsoft Store

In case you are using Windows in S-Mode, you need to install the Norton Antivirus from the Microsoft store. Below, we have provided the step-by-step process which help to download Norton from Microsoft Store:

  • First, you need to visit the official website of Norton, and from there, you have to sign in with your Email ID and password.
  • There will be an option available on the page marked as “Get it from Microsoft,” which you need to locate and select. After which, you will reach the official Microsoft store.
  • There, you need to search for the Norton Device Security product that you wish to use.
  • Download it, which will automatically install it on your device.
  • Now, open the product where you can either start a free trial period or, in case you already have a subscription, you can sign in and follow further instructions.
Download and Install Norton Antivirus on MacOS

Before you download the Norton Antivirus on MacOS, you need to make sure that you have a version of Mac OS X 10.10.x or later, which can be considered the minimum system specification requirement to install Norton Antivirus on a Mac device. After that, follow the given steps:

  • Visit the official website of Norton and sign in with your Norton account email and password.
  • Once you have signed in, on your homepage, you can see the list of the products for which you have subscribed. Select the Norton product and click “Download.”
  • After that, two options will be available on the screen in; which you have to select “Install Protection on this PC and Mac” and click on the “Agree and Download” option below it.
  • The download will start automatically, and on the screen, you can see the installation instructions. Once the download is completed, you can click on the file to start the installation process.
  • Once you click on the file, it will open the Norton Installation Window, on which you need to click on “Install.”
  • Once you have clicked Install, you need to install the helper tool, for which you need to provide the administrator password. Once the installation is completed, you need to restart the system.
  • After the restart, you need to give the Norton Antivirus permission to have access to various other device applications like system extensions, network monitoring, and others. You can do this from the “security preferences” options.
Download and Install Norton Antivirus on other devices: Android and iPhone/iPad.

Users can utilize Norton security on another device apart from their personal computers. In order to install Norton antivirus on Android, iPhone, or any other device Apple device, follow the given steps:
Download and Install Norton Antivirus on Android Device
Android users can download the Norton antivirus from the Google Play Store, for which they can follow the given steps:

  • Open the Google Play Store on your mobile. There you need to type Norton on the search bar.
  • From the given option in the search result, select the Norton 360 App and download it. Once the download is completed, open it.
  • Now, you have to sign in using the mail ID through you which you have opened the Norton account.
  • Complete the sign-up process, choose the product according to your requirement, and then make the payment.
  • Now your Android device has become secured by the Norton Antivirus. In order to utilise the full benefits of Norton Antivirus, you need to provide permission to the app to have access to your device.
  • To provide permission, you need to open the Norton application and after that , open the Permission Setup from the settings and allow Norton to draw over other apps, have location access and run in background.
Download and Install Norton Antivirus on iPhone and iPad

You can download the Norton Antivirus from the official Apple store for your iPhone and iPad device, for which you need to follow the given steps:

  • On your iPad or iPhone, open the Apple store, where you need to search for the Norton 360 App.
  • Click on the download icon to start the downloading and installation process.
  • After the installation completes, you need to sign in and then accept the terms and conditions to start using the Norton Antivirus for your iOS device.

Various Features of Norton Antivirus over other Antiviruses

Various Antivirus is available for users in the market to keep their system safe and secure from viruses and malware files. The reason why you should prefer Norton antivirus is the digital security and online privacy, which have now become the basic demand of the users as now the most common source for malware files to have access to your system is the internet. Apart from the above two features, various additional benefits from Norton Antivirus are listed below:

VPN in Norton

To browse the internet safely, you must need VPN (Virtual Private Network)

Password Manager

Someone can easily access you account and other important details, which can harm you economically. With a password compromised, all your details, including your financial assets, will be at risk. Thus you mustn’t share your credentials anywhere while browsing the internet. This product help you to keep your online transaction details secure. For that, Norton Password Manager is the best choice.

Safe WebCam

With Norton Antivirus, your system and the camera will be protected from an unauthorized access by other phishing websites.

Get Norton Antivirus for Free

If you are not sure about Norton Security, try our trial version product.  In case they are not happy with Norton’s service, they can easily opt-out of the Norton services. For that, they need to visit the official website and sign in with their email and password. There under their active products, they can select to discontinue from Norton Products.

Reach out to us in case you need assistance with Norton Antivirus.

From the above discussion, we hope that now you can easily download and install the Norton antivirus on your system. Make sure that you have subscribed to Norton Products and services. You can download Norton products easily from the official website. If you facing trouble while deciding best product for you, reach out to us. We can recommend the right product based on your system specification, daily activities, and other requirements.  You also can dial our toll free number mentioned above for efficient and effective solution.